Feel free to comment to one another but note we will not be able to answer questions regarding existing posts.
~Ken Jr.
| Observations |
|
|
The author and curator of this site passed away June 2021. In his memory we will keep this site running as long as it brings value.
Feel free to comment to one another but note we will not be able to answer questions regarding existing posts. ~Ken Jr.
8 Comments
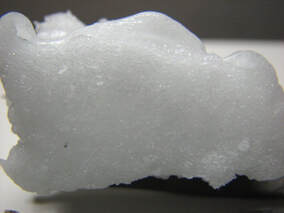 Video Below: Periodically I have a need for a good closed cell foam but not often enough to stock varying densities of different types of foam for occasional use. I have a preference for silicone foams as they have more physical qualities that allow some real latitude in use. But, I still did not want to buy the foam and decided to make it myself. I wanted to do it totally using simple chemistry and not get involved with CO2, O2, and nitrogen generation as foam producers. What followed was a number of experiments in thinning silicone caulk, and generating CO2 as the foam producer. Little did I realize how many roads of partial success and failure I was about to travel! My overall goal was to produce a good, stable, and functional foam using materials that are already in our homes and readily available locally. This will be covered in the video and the best formula and procedure will follow the video. But I will start with the finished product so you can decide to watch my process or not. And, as always, comments and dialog are welcome. Enjoy the trip! Standard Formula Materials:
Silicone caulk. Use GE type one, Dap, or other acetoxy cure silicone. The caulk has to cure with moisture liberating acetic acid. This is the one most used for sealing bathtubs and other areas. (Look for releases acetic acid on the back of the standard 10 ounce tube). Silicone oil. Used for lubrication of many materials and readily available at hardware stores. I used Super Lube from Home Depot but any will work to thin silicone. (I learned the hard way to not use V M & P naphtha, Xylene, or others as they causes too many problems). Surfactant. Any dish washing detergent to lower surface tension. Baking Soda. Sodium Bicarbonate. Vinegar. Regular white distilled vinegar. Instructions: Weigh out 20 grams caulk, 2 grams silicone oil, and 3-4 drops dish detergent. Stir well to integrate. These steps go together easily. Add 10 grams baking soda. (Move quickly but mix completely to prevent voids. This will begin to skin over and release some acetic acid smell but this is normal). Add 5 milliliters vinegar and continue to move quickly. (The mix will begin to foam but settles down fairly rapidly. You now have a stable closed cell silicone foam). It will cure externally in several minutes and cure completely in 12 hours. As most caulks perform, maximum strength is reached in 2-3 days. 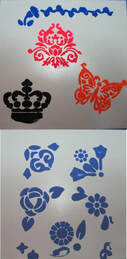 Video Below: IMPORTANT UPDATE: I have just discovered that the hairspray can interfere with the adhesion. If you notice in the video that I sprayed the stencil near the tile and that caused a problem. So, make sure that you spray away from the tile or better yet don't use any adhesive if possible. Also, heat for 6-to8 minutes to get the best bond. I need some assistance and your ideas on this project to help make this a really versatile imaging process. I have some of the most creative and clever readers/viewers and together we can make what I have started very useful and innovative. As always, this site is free and open source and meant to be a shared space! Some unfinished ideas are: can it be done on glass and can it be used with stamps? I am sure that you will have some great ideas. Thanks, Ken. One of the most typical uses of heat set fabric inks is for the silk screen printing of fabrics like cotton T shirts or other common fabrics. But several years ago I tried screening ceramic tile and when heat set it is permanent and looks really quite interesting. One of the requirements is that a screen process is used and it is time consuming and not of interest to many people. So. I thought what about using a stencils making it easy and fun? I have always used Speedball fabric inks which are water based, non-toxic, and easy to clean up. And while there are other brands I have no experience with them so I will show what I know to work well in the tile application in the attached video. There are several important features that make stenciling on ceramic tile very exciting. The first is that once heat set with a regular iron on high with no steam the image is not going to come off. It can be removed but you will have to use bleach to completely clean off the image. Otherwise, it is permanent! The second is that it takes very few tools to make images. Third is that until heat set the ink is readily cleaned off if you made a mistake and you can do it again. One of the important pieces of this project is the temporary placement of the stencil. It can't move and must hold down all of the stencil but be easy to remove after applying the ink. The temporary adhesives used for this purpose are difficult to strip after use and I have never liked using them. So, I used a trick that I started using several years ago. The material is Hairspray! It holds perfectly and doesn't need to be stripped after the image is applied. I use Aqua net but any brand should work as well. I had the hairspray for other projects and it is fairly old but still works. I use 12X12 ceramic tiles in the video but any size will work. And since the surface is heat set it can be used as a trivet or just a nice decoration. So, watch the video and as always comments are encouraged. Enjoy, Ken. NOTE: The information that I have shared is a "proof of Concept" which means that what I have shown is accurate and true in my experiments. However, it does not guarantee that everyone will have the same result. Some will have excellent results and others will have some failures. I did! So dig in and share both with all of our readers and viewers. Thanks, Ken. Additional Note: You may notice that sometimes I have an unsteady shake but please don't be concerned. I am not a professional video user and making videos are sometimes anxiety provoking. I do the best that I can to provide projects and a little shake is natural for me. I guess that I'm not ready for prime time! 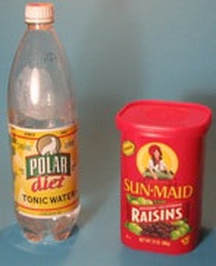 Video below... I originally posted this simple project in 2011 but it should have been designed to appeal to kids and the terminally curious so I am making the changes needed. I am still fascinated by these simple processes and hope that you will be as well. Carbonated beverages have been known for a very long time and the first ones were naturally occurring and had noticeable features. Carbon dioxide is slightly acidic and gives the beverage a slight tang, and it is a preservative as well. It can be seen to change the taste when the CO2 is gone, or the beverage has become flat. The taste is sweeter and not as enjoyable. Joseph Priestly was the first of many experimenters beginning in the 1770's who helped to give rise to a now mature product. The reference to Cartesian divers is not really accurate as Descartes was exploring the gas laws. I guess this is an example of poetic license! I was curious to determine how much CO2 a one liter bottle of carbonated water contained, so I weighed the contents with all of the CO2, and then heated the contents without the cap at a slow rate. After it was all free, I re-weighed the bottle and found that it was about 3.8 grams! That translates to about four times the volume of the one liter contents. That's a lot of CO2! This particular beverage was tonic water that also contains quinine. According to the manufacturers, they charge the CO2 at about 2 atmospheres, or a little less than 30 PSI (Pounds per square inch). And although I misspelled raisins in the title, the video is just for fun. It is also a two for the price of one. Enjoy and have some fun with science...  This entry is a re-post from 2014 because I would appreciate your input and suggestions. Should it be crafts, science, or some bizarre idea? I would like your thoughts and welcome guest posts. I know that many of my readers are creative and I want them to share as well. Please take the time to write a comment and we can provide open source ideas together. Thanks, Ken. Over the past four years I have posted a variety of projects and information that I thought may be useful to my readers/viewers. Some have been very well received as was the “Anodizing Aluminum without Battery Acid” and it has been translated into at least 15 languages around the world. The post on “Reusable Molding Material” also received many comments and community response. Also, the “Static Electricity Detector” was read frequently. But others either have generated none or very few comments. So, I am not sure if my efforts are wasted, no comments necessary, or useful in any way. So, I am reaching out to you for some feedback and direction. Despite the fact that I maintain four separate topic pages, the Science and Technology page is my main interest. I have been pursuing what I hope will be interesting, entertaining, and informative posts. But it would be helpful to know if you want chemistry, crafts, physics, electronics, or other types of projects. So, I would appreciate the time it takes to write a short comment to guide me in my choices of science topics. Some of my projects take time to research, develop, and test. I try to offer some originality and versatility and I frequently have failures. (Don’t we all?) I could copy other sites but there is little value if the project requires no thought process. I usually have some pretty bizarre ideas and they may fall outside of what you may want. For example I am working on an infra sound project, (sounds below human hearing), and a silk screen photo emulsion made at home. But maybe you want something else and I could use the feedback to craft new science fun. I am also open to guest posts if you have a project that you would like to share. Leave a comment and I will post my email so we can chat! Thanks, Ken… 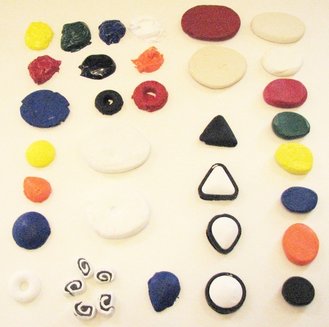 Video and links below: This post is a general explanation of what polymer clay is and how it is made and is not intended to be a tutorial on the chemistry of plastisols. But it does provide a background for understanding the commercial products and includes the shortcut that I have discovered that will allow you to make "real" polymer clay at home in a very cost effective manner. The video should be considered a "proof of concept" as there is still a lot to do and explore. I offer the work in good faith in the hope that there will be readers/viewers who will help move the project forward. Polymer clay as both a craft and an art form seems to be one of the most popular activities for home enthusiasts who enjoy making unique and frequently useful jewelry, figurines, and other personally individual items for fun and profit. But, polymer clay is not a clay! It is a polymer and more specifically it is a plastisol which is a polymer with a plasticizer. In the majority of commercially available products, the polymer is polyvinyl chloride in powder form (PVC), and the plasticizer, typically a thick viscous liquid with a boiling point above 200 C. The plasticizer can be any of several materials that are considered generally safe. But, all of the products sold as polymer clay are proprietary and closely guarded secrets. In addition to the two basic ingredients they have to add thickeners, fillers, color pigments, and other materials to make the polymer into a putty like consistency for effective model making. Polymer clay remains workable until cured. Curing occurs at temperatures from between 265 °F (129 °C) to 275 °F (135 °C) sustained for 15 minutes per 1⁄4 inch (6.4 mm) of thickness. This temperature is significantly less than for mineral clays that are fired at high temperatures and can be achieved using a home oven. The clay does not shrink when cured. Brands of polymer clay include Fimo, Sculpy, Premo, Cernit, Formello, Modello, Du-Kit, Pardo and Kato Polyclay. A home pasta-making machine is a popular multi-purpose tool for polymer clay artists. It is used to create sheets of uniform thickness, to mix colors or construct variegated sheets, and to condition (soften) the clay. Polymer clay generally needs to be conditioned prior to use. This involves kneading the clay by hand, passing it between two rollers, or using a low-shear mixer to break up any resin particle adhesion. Once conditioned, the clay will remain pliable until the particles eventually re-adhere. How this project evolved: Plastisols have been around for many years and were, at first, a substitute for Bakelite. I have been familiar with PVC plastisols for a long time and recognized that polymer clay was a plastisol in "putty" form. I thought about making some and posting the result but realized that it would require a lot of effort to obtain the materials needed. There was the need for a fine grade of PVC powder, a suitable plasticizer, and fillers and processing aids to provide a usable products. My considered opinion was that it would not be easy to translate this into a product made easily at home for crafters. But, fortunately an idea occurred to me that would make it possible with only two readily available ingredients. The break came because I do my own silk screening with mostly water-based heat set inks that can be cured with a regular iron. But, I did buy some plastisol ink for experiments with an ink that is used almost exclusively for silk screening professionally. But, I found it difficult to use and cure t-shirts in the oven! And then recently I recognized the possibility of making polymer clay with the plastisol ink and kaolin clay. Kaolin clay is often referred to as a fumed silica and becomes part of the polymer clay. And while the plastisol ink and kaolin will have to be purchased online, unless your local craft store carries it, the economics make up for the purchase. I did a fast cost analysis and the "real" polymer clay can be made for less than half the cost of that sold online and craft stores. Video and links to materials follows: Comments and questions are always welcome and will be a part of making the project better. Ken. Materials used with this project:
Plastisol ink, 7 color 4 ounce size at Amazon here: Plastisol ink both 4 and 8 ounce sizes from STS Industrial here: Plastisol ink white, 1 quart ( scroll down to basic white) at Dick Blick here: Kaolin White Clay, at Bulk Apothecary here: The above are not endorsements but sources that I used and a search for for other may be helpful. 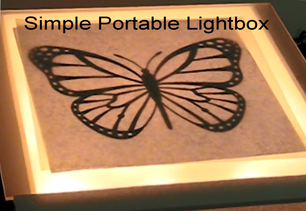 Video Below: This video is also on YouTube. Light boxes that provide back-lighting for the purpose of tracing or drawing have been around for many years and take as many forms as there are people who use them. However, the ones that are sold commercially are fairly expensive and not usually portable and collapsible as this one is and it can be assembled and disassembled in less than 30 seconds and stored. However, the newest ultra-thin ones are really portable but are designed for those who are commercial artists. But, the one that is presented here is for those of us who only use a light box periodically and have a need to assemble it easily and store the light box flat and out of the way. Using simple to find and use parts such as foam board, Plexiglas, and Christmas tree lights make the build easy and still quite functional. So, as always, any questions and comments are welcomed and I will answer so feel free to comment. Enjoy! 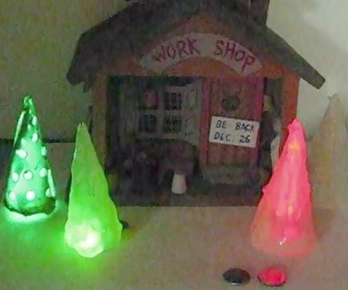 Video Below: The holidays are always an interesting time to think about different kinds of craft ideas and I must admit that I sometimes just get too busy with other projects to make the time to construct something unusual. But, this year I wanted to try a new approach to the traditional Christmas tree concept. The idea for hot glue Christmas trees stems from my original method of making color hot glue sticks (YouTube video here) and the fact that hot glue does not form an adhesive with parchment paper; this is due to the fact that the parchment paper is coated with silicone and can withstand temperatures of around 400 degrees Fahrenheit. So, it seemed like a good candidate for some experiments using a parchment paper cone as a template. The best way to light the resulting trees was to use LED’s (light emitting diodes) of different colors and effects. They are easy to obtain and by far the easiest is to find dollar store items that use LED's and simply use them. But, there are many sources on the web and I have bought many of mine from the Electronics Goldmine here. This is not an endorsement; just another surplus electronic site that has been a good source for my needs. So enjoy the video and add comments and questions about the project.  Video Below: The concept of using edge lighting in transparent materials has been known for many years. The light travels through the distance of the medium, whether it is a clear polymer or glass, by way of internal reflection. The light goes from edge to edge and escapes at the far edges with the effect of no light being lost. This is true of glass fiber as well and is the basis of fiber optics. But an interesting twist happens when the surface between the edges is disrupted by a surface scratch or in the case of glass, when the surface is etched. Some of the light exits at the disruption and with some effort, a design can be made to be apparent to the viewer. In the majority of examples of these designs the image is carefully cut in to surface of a piece of acrylic or other transparent plastic using something like a rotary tool or even a sharp blade. But, the work can be tedious and demanding with some level of patience required. However, there are some methods that can make the process easier; but it takes some expensive equipment like a CNC router, laser cutter, or similar computer controlled device. But I do not have these in my DIY arsenal so I had to look for an alternative. So, it finally occurred to me that it would be interesting to make the entire surface light up using strip light emitting diodes (LED’S), and utilize a transparent image that could be changed to alter the subject with the same piece of acrylic. I tried several techniques including etching acrylic with acetone but the easiest and safest method was accomplished by simply sanding the surface uniformly. After some experimentation I finally settled on sanding the surface with 220 grit garnet paper which is readily available. In order to get a uniform and consistent surface, a circular motion was found to be better than directional sanding. So, using strip LED’s and a transparency made on an inkjet printer, the effect is what I was looking for. After seeing the image I realized that the image could be made directly on the sanded acrylic with paint and a stencil. If the image needs to be changed we can simply remove the paint and make another image. Some questions remain and other images should be possible. For example, how about stamp pad images or transparent inks? So much to do and so little time! Note: I am including the Amazon link as a guide as to what I used and is not an endorsement of these or any other manufacturer. As mentioned in the video, I would recommend getting strips without the silicone weather proofing surface to make connections easier. The Zitrades and other connectors are listed below the light strips. The link is here:  Video Below: The science and art of making photographs on leaves has been around for quite a long time. In some cases, it is a fine art, and in other situations it is just a craft that is fun and challenging. But, in either instance there is one major problem; making an image that has some ability to last over time. The typical approach is to embed the leaf with the image in a clear epoxy or sandwich it between Plexiglas with UV protection. If some method of preservation is not used the image will continue to bleach when exposed to light. And, for me, the task was to come up with a simple process to stabilize the image and still maintain the image integrity. After many experiments, the process I came up with, while still a work in progress seems to work fairly well. And, there is a bit of chemistry involved, but the information on that aspect is not necessary for readers to use the information to produce leaves with images. But, here are the steps that I used to make and preserve the images: First, the following materials will be needed: Baking soda, glycerin, and copper sulfate. The copper sulfate can be found at garden centers and hardware stores sold as root killer. The glycerin can be found at all drug stores. Second, gather some leaves, either from your own yard or from the super market. Place a strip of aluminum foil over each leaf and make a sandwich under glass as shown in the photos below. Third, place the leaves in the sun and watch over time to see the bleaching of the chlorophyll. With the leaves that I selected the best were Japanese Knotweed and spinach. Some leaves will bleach in a few hours but some may bleach more slowly or not at all. Procedure: The process is much clearer in the video but step 1 is to blanch the leaf in a slightly alkaline water solution. In a saucepan filled with enough water to cover the leaf, add just a pinch of baking soda to make the water alkaline and bring to a boil. Blanch for about two minutes. This step will maintain the color but allow the cells to be broken and air to be removed. It will also attack the magnesium in the chlorophyll so that we can replace it with a copper ion. In the second step make a 5 % solution of water and glycerin. (For every 95 milliliters of water (3 fluid ounces), add 5 milliliters of glycerin) 0.17 fluid ounces). This is not a critical measurement but more of a guideline. For step 3 add a small amount of the copper sulfate so that the solution is slightly blue. This solution should be boiled for the first time to remove the air, but after that the leaf can be added to the solution when cold. Step 4 is to add the leaf for about 2-3 minutes. Remove and if it is obviously blue it can be rinsed with water. Lay the leaf flat on a paper towel and dry. The process is complete! Note: The process as described and illustrated in the video worked as evidenced by being able to place the treated leaf in the sun for 4 days with no further bleaching. However, I have used only a small sample of leaves and cannot predict how all chlorophyll containing materials will perform. It is also possible to use light sources other than the sun. Grow lights and fluorescent light with blue and UV light will work but take longer. The work presented is to the best of my knowledge a useful strategy for the preservation of photographic images but as mentioned, is a work in progress. Please feel free to add to this information with your own experiments and ideas. Good luck and have some fun! Alternative Photography leaf photography with chlorophyll Here. |
AuthorThe author has an eclectic background in chemistry, electronics, writing, mental health, and community action...Ken Archives
June 2021
|