How do they work? A cold cathode lamp functions by using electricity emitted from the cathodes to excite mercury vapors using the process of inelastic scattering in order to create fluorescence, just as a typical linear fluorescent does. What sets the cold cathode lamp apart is that by using higher voltage, a cold cathode lamp does not require the cathode to be heated in order to fire and produce light. This allows it to draw less current, run cooler, and last longer. They can be very bright, do not flicker, and are totally dimmable.
A cold cathode fluorescent lamp (CCFL) is a type of gas-discharge lamp similar to linear fluorescent or compact fluorescent lamps. CCFLs are used in a number of different specialty applications, such as cold-weather lighting, display back lighting in LCD laptops, and signage. They are known for high efficiency, long rated life, and their ability to start in cold conditions. The 15 inch that I tested only draws 150 ma and is rated for 50,000 hours! How do they work? A cold cathode lamp functions by using electricity emitted from the cathodes to excite mercury vapors using the process of inelastic scattering in order to create fluorescence, just as a typical linear fluorescent does. What sets the cold cathode lamp apart is that by using higher voltage, a cold cathode lamp does not require the cathode to be heated in order to fire and produce light. This allows it to draw less current, run cooler, and last longer. They can be very bright, do not flicker, and are totally dimmable. These lights are available in both 120 Volt and 12 Volts and come in many colors. They arrive with the 680 volt invertor. The 12 Volt that I used had a 4 pin Molex connector but I cut it off and just used a wall wart, 12 Volts@500ma and connected the red and black leads. These are really inexpensive and fun to experiment with so have some fun. There are so many sites that offer these lights that I did not post a link. Just search "Cold Cathode"Let there be light...
0 Comments
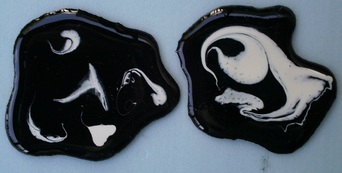
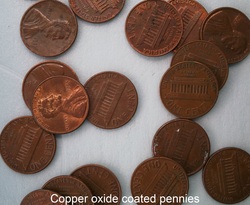
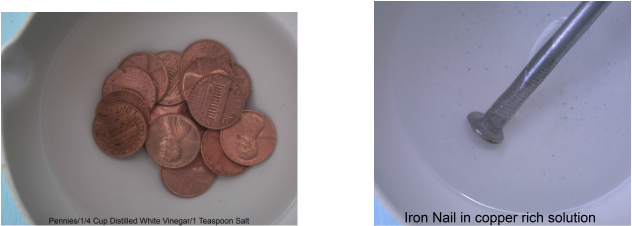
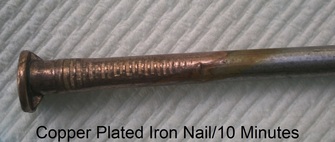
Epoxy is one of the primary adhesive technologies and is used extensibility in industry and in households around the world. It is available as one- part, two- part, paste, and with variable set times. It can help build, repair, and form castings to encase items for show. A very versatile material as an adhesive. But, like everything I see, I want to use it in a way that it was not really intended. So, the photo above shows the capture of a magnetic force in 3D. I used a two- part 5 minute set epoxy (Devcon), but any quick set should work. I mixed a black pigment into the epoxy and then added the hardener. I had some epoxy pigments for coloring epoxy from TAP plastics, but any enamel paint, or shavings from oil pastels will work. I then added some iron filings purchased at a local toy store. But water soluble dyes fail to work so food coloring is not usable. And, in fact, no color is necessary to show the effect. I let the epoxy set for about three minutes to increase the viscosity and then placed the magnets near the epoxy and the particles were attracted to the magnet. Holding for another minute and the epoxy form was set. This photo shows a combination of two colors blending together. I just dropped a little white mix onto the black still unset epoxy. I then used a toothpick to make swirls. I just had to go fast and probably should have used a slow set epoxy. It sort of looks like enameling. Both of these ideas are really crude and need refinement. But I wanted to post so others can try these ideas or discover others. As they say "beauty is in the eye"... Autocatalytic deposition of a metal in ionic solution is sometimes called electroless plating. In this case we will be plating copper onto an iron surface without any electricity. The process has been around for a long time and has many interesting applications. In this experiment we will use 1/4 cup of distilled white vinegar, and 1 teaspoon of regular salt and dissolve with stirring. The salt is added to the vinegar (5% Acetic acid) to provide more of an electrical carrier. (More conductive). Old pennies that have reacted with the air over time form copper oxide on the surface. Copper without the oxide is bright and shiny. If you place about 10 old dull pennies in the vinegar, the oxide will be removed and the pennies will be bright. The copper from the copper oxide that has been removed is now in ionic form, not as the metal. This makes it chemically available to plate out on iron. Leave the pennies in the solution for about 5 minutes then remove and rinse. Note: If you leave a couple of the pennies wet with the solution, they will form a green "patina" in about an hour, which is an accelerated form of copper oxide. Place an iron nail or other piece of iron in the solution for about 30 minutes. You will see the copper actually plating out on the surface of the iron. Shiny screws, nuts, and washers fail to work as they are bright and have been coated with zinc (galvanized) to prevent rust. So, you really need plain iron. This experiment is a fairly simple demonstration of electroless plating. But, the process used in industry is much more complicated and involves a lot of "secret" protected chemistry. It is used extensively for plastics which are not conductive at all. They are "seeded" with a conductive chemical and then copper plated with a strike coat. This is just enough to make them conductive and can then be plated with other metals such as chrome or nickle. Enjoy... Upcoming posts: Ultrasonic cavitation, Cold cathode lighting, and a really cheap Digital counter. |
AuthorThe author has an eclectic background in chemistry, electronics, writing, mental health, and community action...Ken Archives
June 2021
|