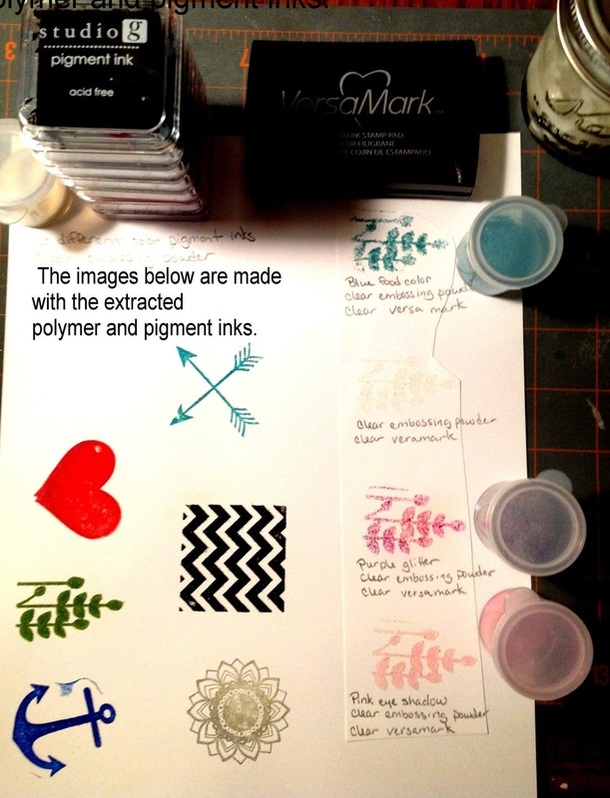
Two videos below: Video 1 shows the results and video 2 illustrates the process.
Thermography is frequently considered to be raised printing typically used for business cards, wedding invitations, and other decorative printed material. The process provides a third dimension of height. The procedure is essentially the use of a slow drying ink, a thermoplastic polymer, and a source of heat. The wet ink receives the powdered resin and is heated until the polymer flows and adds the dimensional effect and becomes solid again. Raised print is also useful in the production of Braille in place of punched indents. Although a fairly mature industry with its beginnings in the early 20th century with copal or varnish resins, there are new uses being discovered. For example, the rubber stamp process has been adopted by crafters and has become a billion dollar business. It has become an “at home” art form with cards, scrapbooks, and new areas of artistic expression. The companies in this business now sell several kinds of ink, embossing, (thermoplastic) powders in many colors, and other peripherals to make the hobby easier and more versatile.
I became interested in the polymers used in the thermographic process but found very little in the literature and patents. There is an abundance of information on the equipment used but most of the embossing powders are proprietary and even the MSDS literature was of little help. I was fairly sure that someone had made some of these embossing resins at home but a search turned up no process. Additionally, after reading several crafting blogs it seems as though there was a desire to find such a method that was easy to do at home and used readily available materials. After many failures and frustrations I have been able to extract a clear embossing powder from a common floor finish. Since this in an open source website I welcome comments and community additions and suggestions to improve and refine the process. Here is the recipe and the two products required for the extraction of clear embossing powder:
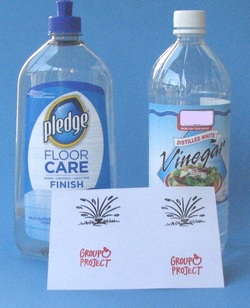
Pledge Floor Care Finish, 798 ml (27 fluid ounces). This was called “Future” until 2008. It is manufactured and sold by S C Johnson. Follow any cautions listed.
Distilled White Vinegar.
Procedure: Add 2 parts of cool water to one part floor finish in a disposable container and not one used for food. With stirring, add vinegar slowly until the polymer becomes thick and very easy to see. Stop adding vinegar at this point. Pour polymer into a sieve or funnel/coffee filter and drain. Return the drained polymer into the original container and add water as a rinse. Drain and transfer to paper towels, spread material and allow to air dry. Reduce particle size by placing dry polymer into a sandwich bag or Cling wrap and apply pressure to make a powder. If a finer powder is required, pass the particles through a dryer sheet as shown in the video.
How it works: The acrylic floor finish is a stable emulsion and is stable due to the fact that the emulsion is kept at a pH of greater than 9. Remember that a pH of 7 is neutral. When we add vinegar that has between 3 and 9% acetic acid, the pH of the emulsion goes down and the polymer precipitates out. The variability of the acetic acid content is the reason that there is no fixed ratio stipulated.
There are other alternatives to consider but they all have limitations. Laser toner is useful but there is no colorless toner and the colors are very limited. Powder coating for metals is an option but very expensive and not generally available in small amounts. So, this project is an alternative material to the commercial products and it is a lot of fun to make your own!

 RSS Feed
